Completed Quilt!

Hey, guys! I forgot to update you on my finished quilt. I really am such a novice blogger. I hope you have enjoyed following along with the progress of this quilt. Without further ado…

Quilt41791760_10216428151992268_7655565298568790016_o

Since this was my first completed quilt I’ve ever made, I learned a lot during the process. If you are learning to quilt and need some helpful tips from a fellow quilter, I’m happy to share my struggles and solutions with you here.

First, figuring out a way to cut all of the required pieces proved to be very time consuming and challenging. If you aren’t sure where to start, here are some options:

  1. Purchase a rotary cutter, quilting rulers, and cutting mat (The largest you can find). The mat will have measurements for you to follow, but the ruler is helpful when you need a raised surface to guide your rotary cutter. Video tutorial coming soon!
  2. As an alternative method, you could purchase an Accuquilt Go! Die Cutter. This is a pricier option, but cuts your fabric into specific shapes in a significantly faster manner.
  3. You could always buy pre-cut fabric as well! It’s not ideal price-wise, but if you’re eager to start a project there are many kits available with detailed instructions.

After all of my pieces were cut (This took about a month since I had to figure out the best way that worked for me) I laid out my design based off of Suzy Quilts’ Rocksteady pattern. It took me only a week of sewing to piece my quilt top together! This part of the process was the quickest. Unfortunately, the task of putting together the quilt sandwich was quite intimidating to me. I had dedicated so much time and effort to get to the point I was already at and I didn’t want to mess up after a month in. So I research.

I discovered that there are many different ways to baste a quilt. I chose the safety pin method. Since I am new at quilting, I didn’t realize how much the material would shift as I ran it through my machine! I miraculously completed the job with minimal shifting, but I still think there is a more secure way to connect the three layers. If you have advice for me, I will happily listen!

The binding was a breeze with Suzy’s tutorial. Check out her site if you’d like to learn this process as well. She explained it very well and in a way that would help even the most beginner level quilter (Like me!) I know I always refer you guys to her all the time, but really, she is amazing. I hope to provide more resources to you all in the future. Until next time!

Here’s a picture of my mom after receiving her quilt:

41729955_10216428152592283_2717634582244491264_o

Xo Kassandra


Advertisement

Final Stages

Hey guys!

I can’t believe it’s been so long since I’ve updated this thing. If you have been following the progress of my Rock Steady quilt on Instagram, you’ve seen some updated photos of this project. I decided to post them on the blog as well.

These pictures show the “quilt sandwich” going through the basting process and quilting lines are beginning to take form. Currently, the entire blanket has been quilted and trimmed. All that is left is the binding! You have no idea how excited I am. The next time you see this baby, it’ll be a completed quilt! Now to determine which travel destination to snap some glamour shots of it in all its’ glory. There’s something about a quilt amongst nature that really epitomizes “Cozy” and I can’t wait to share that with you all. Until next time!

Xo Kassandra

Keep Moving Forward

As promised, here is an update of what I accomplished this week. It may not look like much, but precision cutting 64 HSTs and 80 squares is no joke!

Screen Shot 2018-04-23 at 3.23.02 PM.png

I have 80 more HSTs to make before the real fun begins!

While I work on those babies, I’m trying to put together my quilting room. I currently work on my dining room table, which isn’t the best spot to use. I have to constantly put everything away and take it out all over again when I’m ready to work. As Virginia Woolf once said, “A woman must have money and a room of her own if she is to write fiction.” This has also proven to be true for quilting! Fabric adds up and you need every inch of free space to organize the many pieces involved to make it happen capt’n!

I’ve seen many quitters use a design wall. As I’m approaching the end of making all of the squares for my mom’s quilt, I am realizing that a design wall is going to be a necessity. I’m torn about which route I should take to acquiring one. I’ve seen many DIY roll-up walls and they seem easy enough to make. On my next post I’ll provide all the details on how I made my design wall- with pictures! 🙂

Have a wonderful week everyone!

Xo Kassandra

Happy Monday!

This post won’t consist of beautiful pictures of a quilt coming along. In fact, I have very little to update you on in that department. Things have been so busy as of late that I have had no time to devote to my mother’s quilt. I currently have 56 HSTs made with almost 150 more squares to go. I am staying positive about my deadline, though! To keep me on track, I will make a promise to you Honeybears now that I will post a progress photo by the end of the week! 🙂

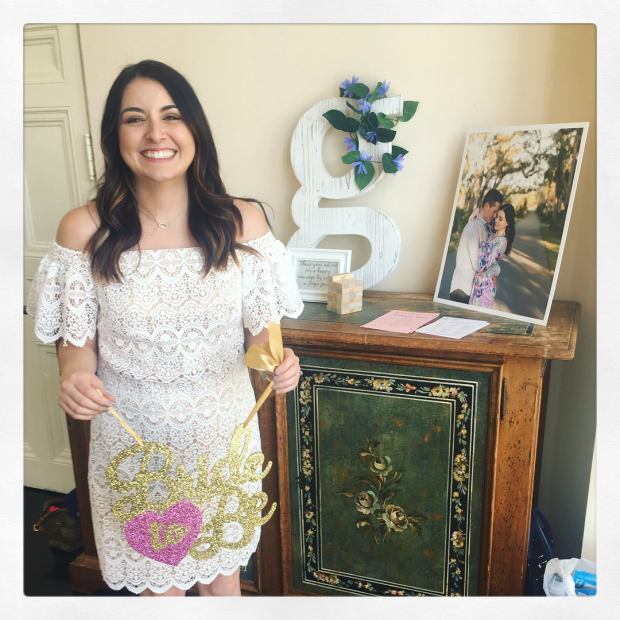
This weekend Andrews family came down from Maryland to celebrate my Bridal Shower. My sister and friends put together a beautiful brunch at this fancy hotel and I am so grateful for their love and blessings.

30706499_10215267563978293_1941440589203505152_o

While that was going on, Andrew was off with his friends for his Bachelor party weekend! It was strange spending the weekend apart, but we both were so busy and had a great time. Now that it’s Monday and we’re back to the normal routine, I feel like I have a lot of catching up to do (Laundry, grocery shopping, quilting, RELAXING- I know Netflix is missing me). How do you all organize your week? I have a hard time fitting it all in. Last week I tried Publix’s Curbside Pickup, which saved a ton of time! I highly recommend it.

I hope you all are having a not so boring Monday! Stay energized and motivated, my friends.

Xo Kassandra

Rocksteady Quilt Progress

Hey guys!

This week I’ve started to put my Mother’s Day quilting plans into action and committed to a design AND fabric! I know you don’t know me that well, yet, but coordinating colors are not my forte. I appreciate all things orange and vibrant, and can eventually put something together, but it definitely takes me some time. We all have our strengths though, right? So I thought I would share the progress of this quilt with you.

Here’s the design It’s Suzy Quilts, “Rocksteady Quilt” pattern. She is an AMAZING designer and if you haven’t checked out her quilts you definitely should! If you don’t feel like traveling away from my blog, here’s a picture:

Rocksteady_Quilt_Pattern_Download

I’m in love! It’s perfect for Mama Miele. I’m going with blue ombre fabrics, as they’re my mom’s favorite.

Screen Shot 2018-04-06 at 5.56.25 PM.png

So far I am in the process of cutting all of the pieces out. If anyone has any tips to make this go a bit faster, please fill me in! I’ve heard the saying many times already, “Measure twice, cut once,” but I could use some additional, seasoned advice. I’m ready to get to the fun part!

Stay tuned for an update, and wish me luck. I probably need some good vibes sent my way to make this quilt happen. If you have any photo inspiration you’d like to share of your past, present, or future quilting projects leave them in the comments!

Xo Kassandra